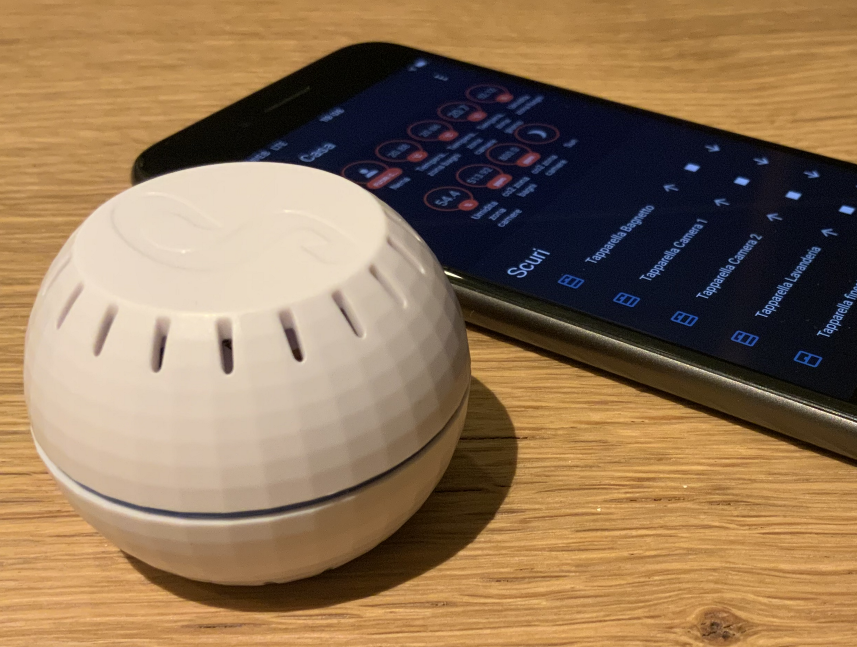
My latest purchase related to the word of the smart home automation has been a Shelly U&T sensor: a battery-powered sensor able to measure both humidity and temperature.
I was looking for a small and affordable sensor that I could easily integrate into my Home Assistant — the mind behind the my smart home — and this Shelly sensor was my final choice.
Why did I pick it?
- It is definitely small, only 3–4 cm in radius (yes, it’s a little sphere).
- It’s is battery-powered and — Shelly says — the battery should have at least 1 year of life (optionally, it can also be USB-powered with a small add-on).
- It connects directly to a WiFi network without the need of an additional controller.
- It should be super easy to set it up, with the companion mobile app.
- It is Home Assistant compatible.
I just finished setting it up and I can confirm that all the points just listed are true. It works like a charm, it was super easy to set it up and I can now access the latest measurements and the historical data.
But there is a but, and this is related to the Home Assistant integration. Once I found the right solution, this was smooth and fast to apply but it took me quite sometime to get there. So, here’s a recap of everything I discovered.
There are a bunch of possibilities for integrating a Shelly U&T sensor and Home Assistant.
- Taking advantage of MQTT for collecting in Home Assistant the latest values measured by the sensor. This is my preferred option!
- Relying on Shelly’s REST interface and configuring a rest sensor. This is the backup option if you don’t have access to an MQTT broker.
- Leveraging the Shelly Smart Home / ShellyForHass, an integration that is available through HACS (the Home Assistant Community Store).
The MQTT option
This approach allows you Shelly U&T sensor to publish its latest measurements on an MQTT queue.
First, configure MQTT in your configuration.yml file (the official documentation is available here). The fields username and password are needed only if your broker requires authentication.
mqtt:
  broker: ip_of_mqtt_broker
  port: port_of_mqtt_broker # the standard one is 1883
  username: username_for_broker
  password: password_for_broker
Then, describe the new MQTT sensors (the ID string should be substituted with your sensor id — e.g. shelly-76GT56).
sensors:
  - platform: mqtt
    name: shelly-ID-temperature
    unique_id: shelly-ID-temperature
    device_class: temperature
    state_topic: shellies/shellyht-ID/sensor/temperature
    unit_of_measurement: "°C"
    json_attributes_topic: shellies/shellyht-ID/announce
    device:
      identifiers:
        - ""
      manufacturer: Shelly
      model: ""
      name: ""
      sw_version: ""
  - platform: mqtt
    name: shelly-ID-humidity
    unique_id: shelly-ID-humidity
    device_class: humidity
    state_topic: shellies/shellyht-ID/sensor/humidity
    unit_of_measurement: "%"
    json_attributes_topic: shellies/shellyht-ID/announce
    device:
      identifiers:
        - ""
      manufacturer: Shelly
      model: ""
      name: ""
      sw_version: ""
  - platform: mqtt
    name: shelly-ID-battery
    device_class: battery
    state_topic: shellies/shellyht-ID/sensor/battery
    unit_of_measurement: '%'
Last, connect to your shelly sensor configuration settings via a web interface (simply click once on the sensor button to wake it up if you can’t find it). Browse into Internet & Security / Advanced — Developer Settings and enable MQTT.
- Fill the fields username, password, server (the equivalent of the values broker:port from your Home Assistant configuration).
- Not using a custom prefix will allow you to receive MQTT on the topic shellies/shellyht-ID/sensor as described in the previous configuration. If you change this field, you will need to update also the .yml sensor configuration.
- Enabling the retain option will allow your Home Assistant to be able to access the latest measurements also after a reboot.
This is it! After a reboot of Home Assistant, you should be able to access the latest measurements of your Shelly U&T sensor.
The REST option
The REST option is, in my opinion, the backup solution if you don’t have access to an MQTT broker to collect the status of your sensor.
It is a matter of minutes writing the definition of the two rest sensors in the Home Assistant configuration file and starting to see their values in the interface.
Here’s the required configuration:
sensor:
  - platform: rest
    name: sensor.shelly_temperature
    unit_of_measurement: "°C"
    device_class: temperature
    resource: https://shelly-XX-XX.shelly.cloud/device/status
    method: POST
    payload: auth_key=XXXX&id=XXXXX
    scan_interval: 60
    headers:
      User-Agent: Home Assistant
      Content-Type: application/x-www-form-urlencoded
    value_template: ""
  - platform: rest
    name: sensor.shelly_humidity
    unit_of_measurement: "%"
    device_class: humidity
    resource: https://shelly-XX-XX.shelly.cloud/device/status
    method: POST
    payload: auth_key=XXXX&id=XXXXX
    scan_interval: 60
    headers:
      User-Agent: Home Assistant
      Content-Type: application/x-www-form-urlencoded
    value_template: ""
The only three pieces of information needed are available in the Shelly dashboard. They are required for compiling the resource and payload fields.
- The Authorisation Cloud Key and the shelly base URL (e.g. https://shelly-20-eu.shelly.cloud) can be found in User Settings / Security.
- The id corresponds to the device identifier and can be found in the Device Information settings.
And this is it! Up and running in no time after having restarted Home Assistant.
Why is it a backup option? Because in order to access up to date measurements it is important to check for updates with a high frequency (especially if measured values are used for controlling Home Assistant automations). A high scannig frequency (this is the name in Home Assistant) will allow to be notified of changes that are probably going to take place seldomly. A low scanning rate will be ineffective in pointing out changes rapidly. So, pick your desired scanning interval with attention by taking into consideration your needs.
ShellyForHass option
I prefer to be able to run my Home Assistant from scratch and having it working without the need to manually configure anything from the interface. This said, the HACS integration is super easy to setup and can be configured directly from the Home Assistant interface.
The Shelly U&T sensor is a great pick if you want to be able to monitor humidity and temperature. Thanks to the integration in Home Assistant is provides all the inputs you need for managing your preferred automations. How am I using the inputs from this sensor in my Home Assistant automations? I use humidity measurements to automatically controlling fans and making sure that humidity remain within the desired ranges.
 A smart home with HomeAssistant, KNX and Apple HomeKit